How to Do a Bulk Discogs Upload
The Bulk Upload feature is an like shooting fish in a barrel way to add or edit multiple Users at in one case.
Common tasks a Bulk Upload tin accomplish are:
- creating Users
- updating User details
- adding/removing Users to Groups
- enrolling Users into Campaigns, Collections or Courses.
To perform a bulk upload, you need to accept a CSV file containing the information of the Users you are wanting to upload, update or enrol. This commodity will show you:
1. How to prepare a CSV file for Bulk Upload
2. How to perform a Majority Upload
3. Bulk Upload Settings and how to use them
Preparing a file for Bulk Upload
The easiest way to create a CSV file for a majority upload is to put your data into a spreadsheet and and so export it to a .csv file.
Your spreadsheet volition need to have specific headings on each cavalcade and so that our system tin identify how to use the data.
Required Columns
The required column headings are:
- firstname - This is your user's first proper name and volition be displayed in reporting and on whatever certificates.
- lastname - This is your user'due south last proper name and will be displayed in reporting and on any certificates.
- emailaddress - This is your user'southward individual email accost and will be used every bit their username. A validity bank check will be performed on this column.
Optional Columns
The optional column headings are:
- addgroup - This will add the user to the identified group
- removegroup - This will remove the user from the identified group.
- uniqueid - This will add information to the ID number department in the user's details
- state - This volition add data to the Country section in the user'due south details
- phonenumber - This will add data to the Phone number section in the user'southward details
Campaign Only Columns
Entrada Bulk Upload files can also include columns with the headings:
- languagecode - This should be entered in the IETF language format. The language codes we support are (zh-CN) (en-CA) (da-DE) (ja-JP) (ko-KR) (fa-IR) (pt-PT) (es-ES) (vi-VN)
- agentemailaddress - A single or multiple gear up of e-mail addresses separated by either a semicolon (;) or a comma (,). Agents will exist notified via email on enrolment and completion of the Campaign
- parentemailaddress - A single or multiple set of email addresses separated by either a semicolon (;) or a comma (,). Parents will exist notified via email on enrolment and completion of the Campaign
Download the post-obit template and add your information. Remove whatsoever columns that you will not be using.
Majority Upload Template
In one case you accept entered your data and deleted the columns you are not using, your spreadsheet should look similar to this:

Notation: You tin can upload 250 users per Majority Upload. If you are wanting to upload more than than 250 users, you lot will need to do multiple bulk uploads. Alternatively, contact us at support@intuto.com to discuss other upload options.
You can then export your spreadsheet to a CSV file.
Exporting from Microsoft Excel:
Click File, then Export, so Alter File Blazon, and select CSV (Comma delimited). Them click Relieve As and save your file.
Exporting from Google Sheets:
Click File, then Download, and then Comma Separated Values (.csv, current sheet). Your CSV file will now download.
If you open your CSV file it should look like to this:
Performing a Bulk Upload
Now that y'all accept your CSV file ready, you tin upload it into the system.
Go to the User page and click Bulk Upload in the top right.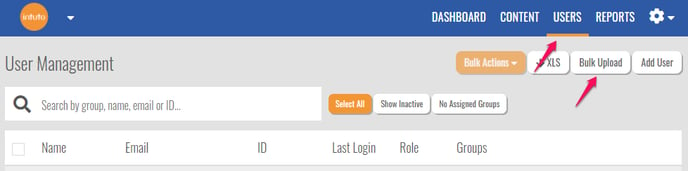
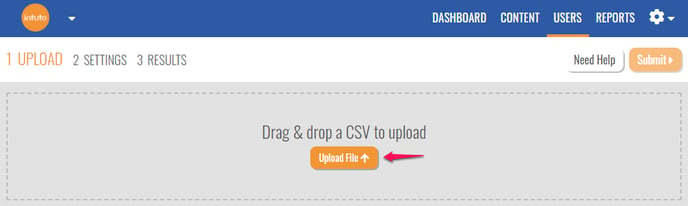
Drag and driblet your CSV file into the box or click Upload File and select your CSV file.
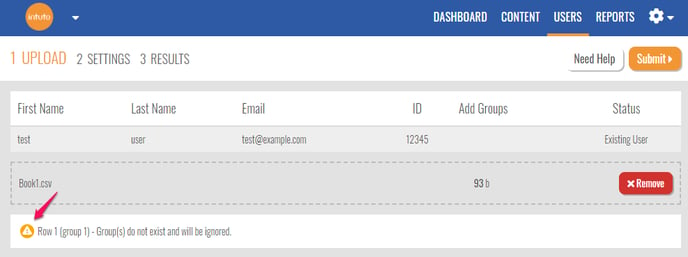
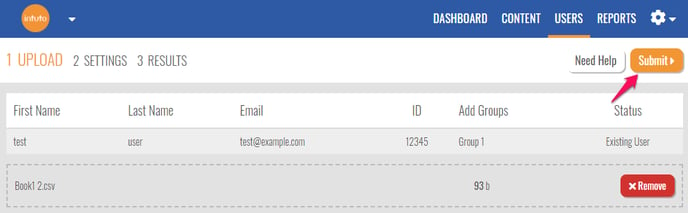
If there are whatever issues with your data y'all will see an error icon with an explanation. Each line will tell yous the data row of the error and what the error is. You can either go along with the Majority Upload (the identified errors will be ignored), or you can fix the errors first.
 Mutual Majority Upload errors:
- Grouping(s) do not be - You need to create the Group before y'all tin can add users to information technology. Learn how to create a group hither. If you lot have already created the Grouping, make sure the spelling matches.
- Firstname/Lastname/Emailaddress is a required field - These are required to create an business relationship in the organisation, fill in the missing information on your sail to set up.
- Not a valid Email Address - The electronic mail accost does not meet the standard "example@instance.com" format. Make certain the e-mail address is correct on your sheet to fix.
If you take edited the data in the CSV file you will need to salve it and upload the new version to Intuto.
Remove the current file past clicking Remove.
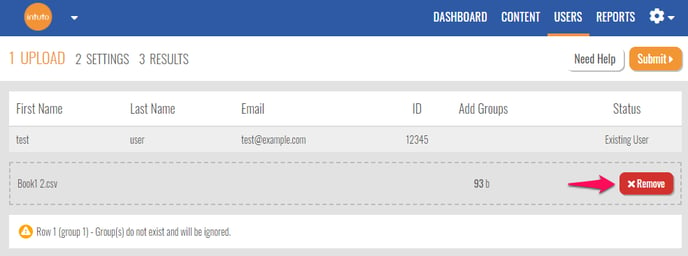
Upload your new file by dragging information technology into the box or click Upload File and select your new CSV file.
One time you lot are happy with the data yous are uploading, click Submit to go to your Bulk Upload settings.
Bulk Upload Settings
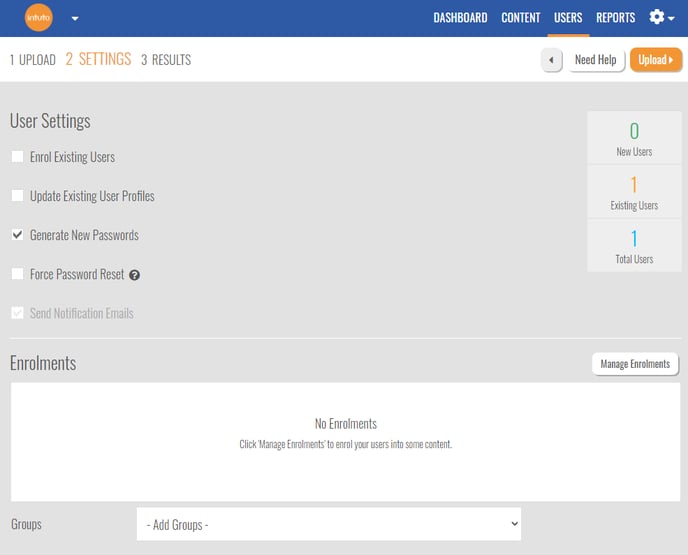
User Settings:
- Enroll Existing Users - If this box is ticked, any existing users in your Bulk Upload file will be enrolled into the content selected in the Enrolments section. If this is non ticked, but new users in your Bulk Upload file will exist enrolled into the content.
- Update Existing User Profiles - If this box is ticked, changes volition be made to existing user profiles (groups added/removed, ID added). If this box is not ticked, only new users enrolled in this majority upload will be affected and any changes to existing users will be ignored.
- Generate New Passwords - If this box is ticked, new random passwords will be created. If this box is non ticked, you will be able to type in a default password that volition be assigned to all users.
- Force Password Reset - If this is ticked, your users volition exist forced to reset their password when they next log into the organisation.
- Send Notification Emails - Notification emails are sent if 'Generate New Passwords' is ticked as each user will need to be notified of their countersign. If you are entering a default countersign you lot can choose not to send a notification electronic mail.
Enrolments:
Click Manage Enrolments to choose courses, collections or campaigns for the users in this majority upload to be enrolled into. You tin can just enroll into 1 type of content per bulk upload.
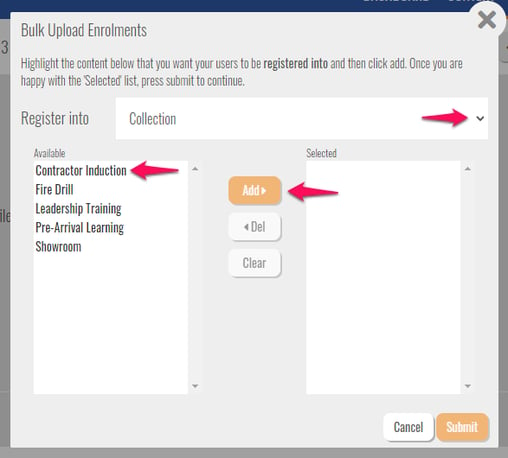
Use the downwards pointing arrow to select between Courses, Collections and Campaigns.
Select your content from the list on the left and click Add together>.
The content yous take selected volition so appear in the list on the right. Yous can select it and click <Del to remove it from the listing, or click Clear to articulate your selections and start once more.
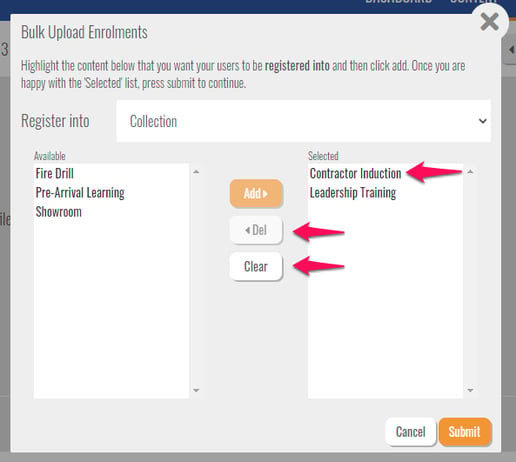
Once you are happy with your selections, click Submit.
Your selected courses, collections or campaigns will appear in the Enrolments box. You lot tin can as well click Manage Enrolments once more to edit the selected content listing.
Choose a group from the drop downwardly box to add the users in this bulk upload to a group.
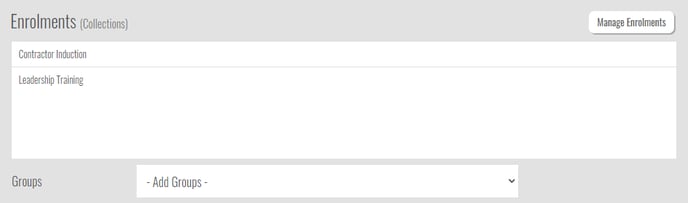
Note: Anything yous select in the Enrolments section (content and group) will be applied to all users in this majority upload.
Once you lot are happy with your settings, click Upload to load your data into the system.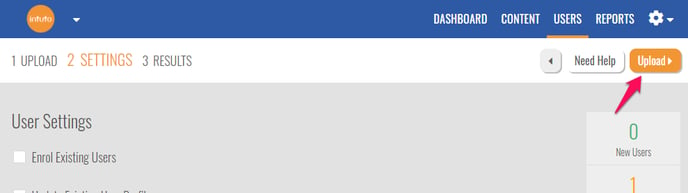
You will so see the following popup.
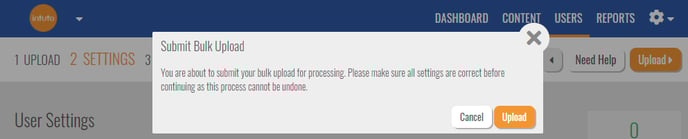
Click Cancel to go back and edit your Majority Upload, or click Upload to proceed.
One time your data has been uploaded yous will be shown the results.
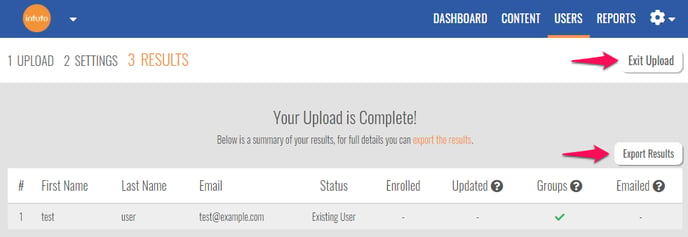
Click Export Results to download an Excel Spreadsheet of your upload, or click Exit Upload to return to your User page.
Yous will likewise receive an email to advise that your Bulk Upload has been completed with a link to the upload results.
If you have any questions about the Bulk Upload procedure, or if you would adopt that we do the upload for yous, please contact back up@intuto.com.
Source: https://support.intuto.com/how-to-do-a-bulk-upload
0 Response to "How to Do a Bulk Discogs Upload"
Publicar un comentario